Help
Cloudinho Functions
![]()
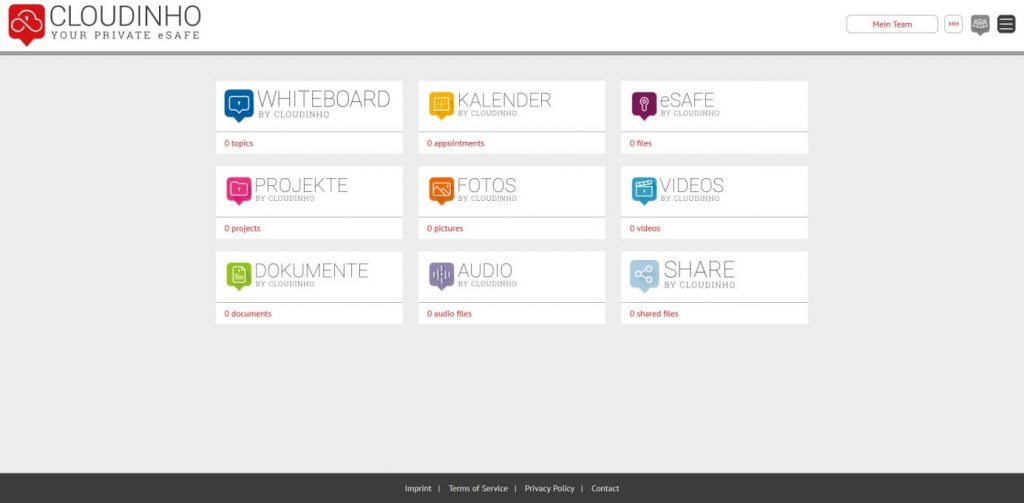
Basically, you can access all areas of CLOUDINHO via the dashboard. By clicking on the respective logo on the top right you will get back to the dashboard.
Dashboard with news
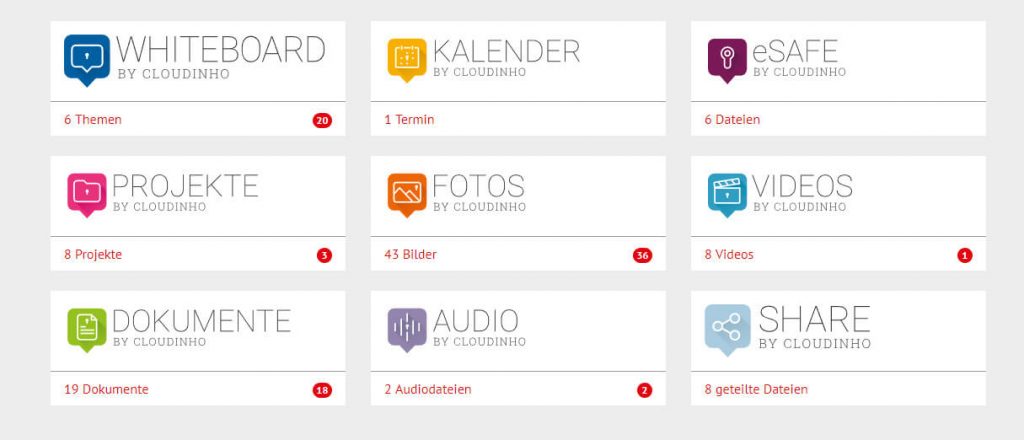
In the dashboard you can see on the right under each heading how many files are available. If there are new files, they will be shown on the right in a red circle.
On the top right of the screen you will find the following functions:
1.1 Team Name
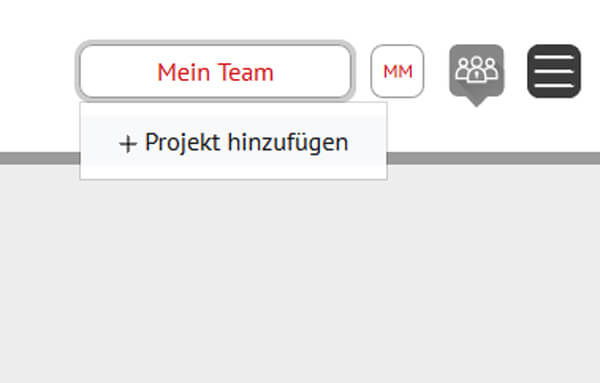
If you click on the team name, you can add a project. If you are active in several projects, you can also switch between the projects here.
1.2 My profile
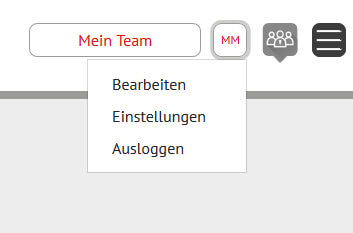
If you click on your profile button, you can choose from three points:
a) Edit
b) Settings
c) Logout
a) Edit
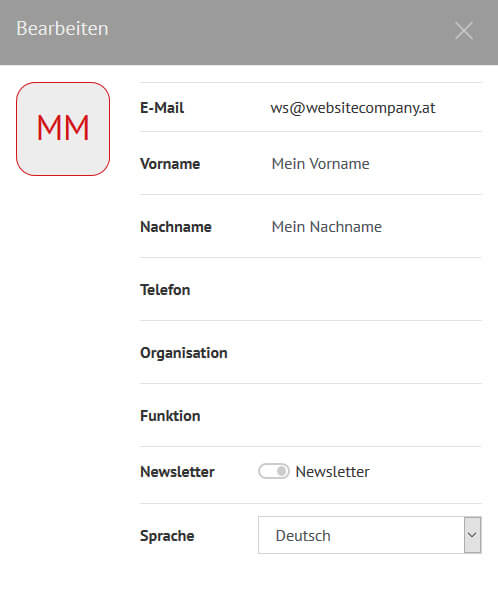
Here you can manage and complete your profile. You can change the language and you can click to upload a photo instead of the initials.
b) Settings
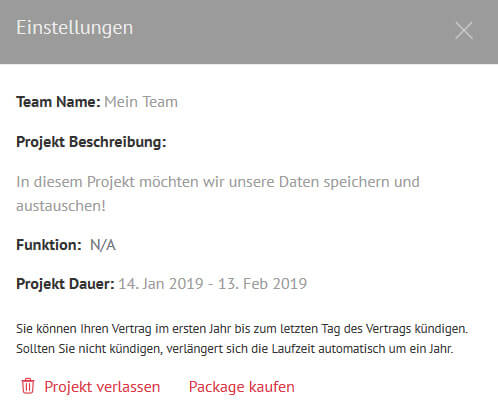
Here you can see your team name, the description, your function and the project duration. You can buy a package here if you have chosen the trial version and also cancel the project. If you cancel the project here, it automatically ends with the specified runtime.
c) Logout
means that you log out of the project.
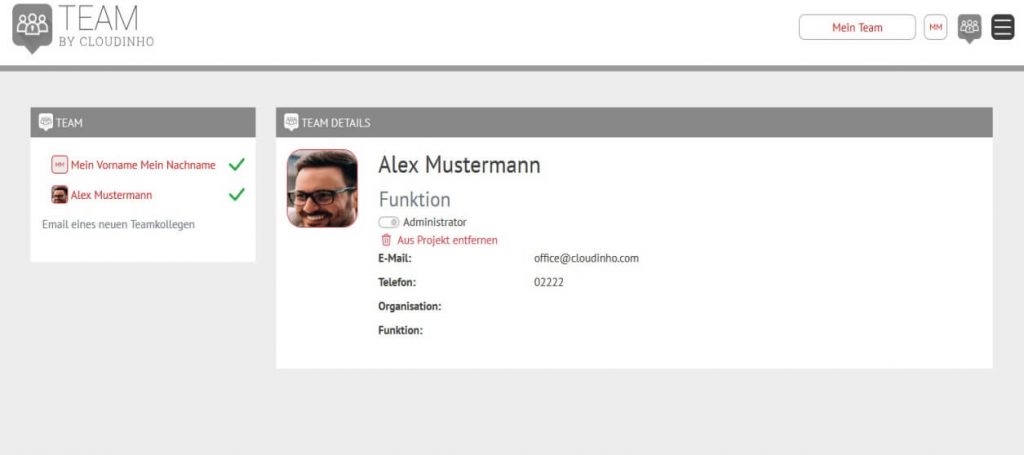
1.3 Team
Click on the button “Team” to open the team overview. Here you can see all team members. If a green check mark is visible, the team member is already in the project. If there is no tick, the new user is already invited but not yet logged in.
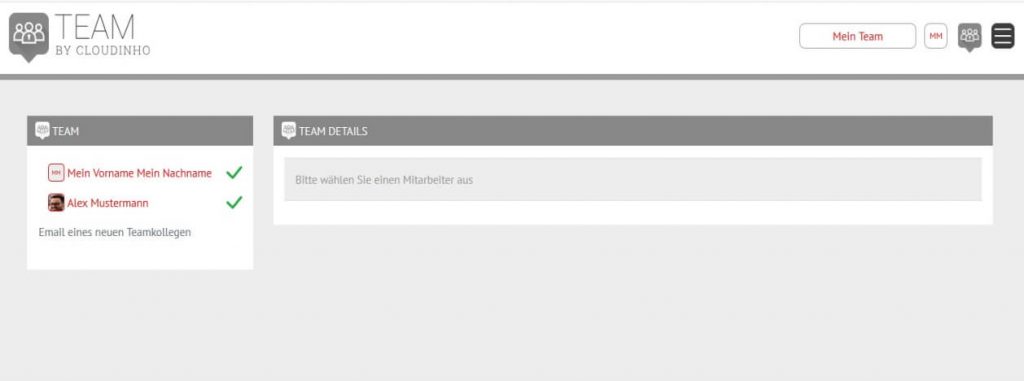
If you click on a team member, you can see the respective profile. As an administrator, you can make the team member an administrator or remove him from the project.
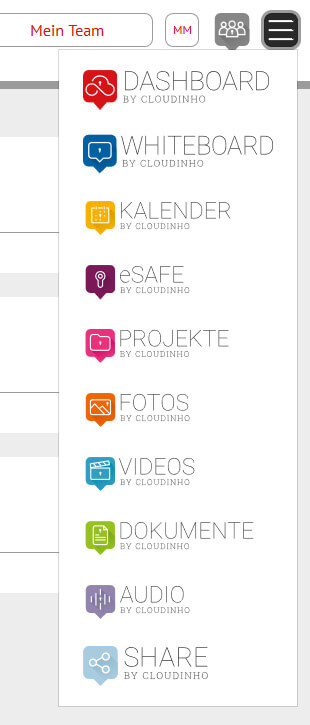
1.4 Navigation
With the “Hamburger-Icon”, the navigation, you can control all areas of CLOUDINHO.
![]()
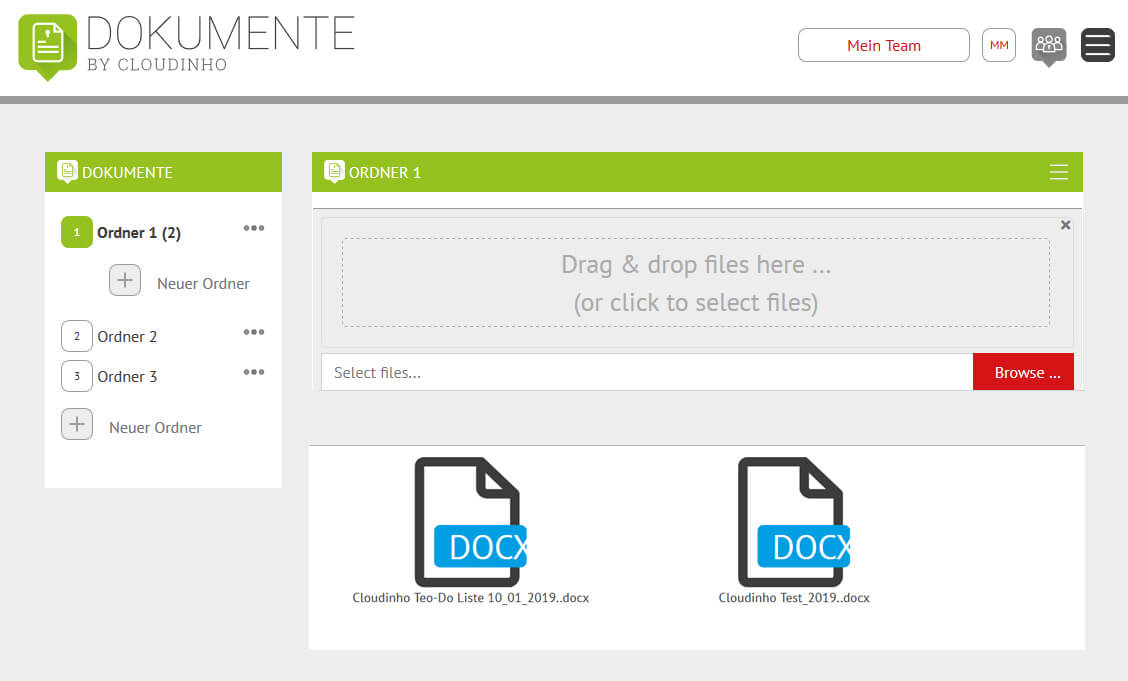
In the “Documents” section you can save the following file formats: psd, indd, pdf, doc, docx, xls, xlsx, ppt, pptx.
2.1 Folder
In the Documents area, you can create a folder structure with any number of folders and subfolders. You can upload and save your documents in these folders.
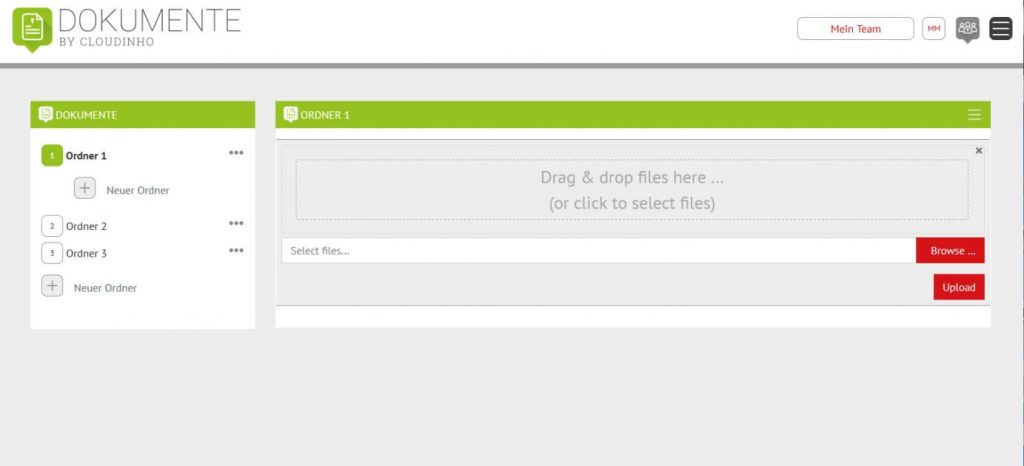
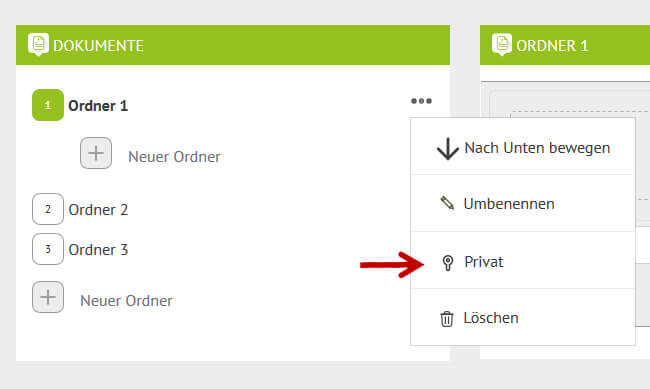
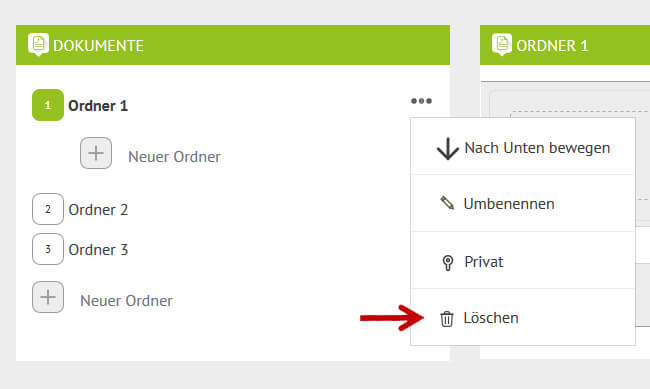
Each folder has 3 dots on the right side. With a click on these you can do the following actions:
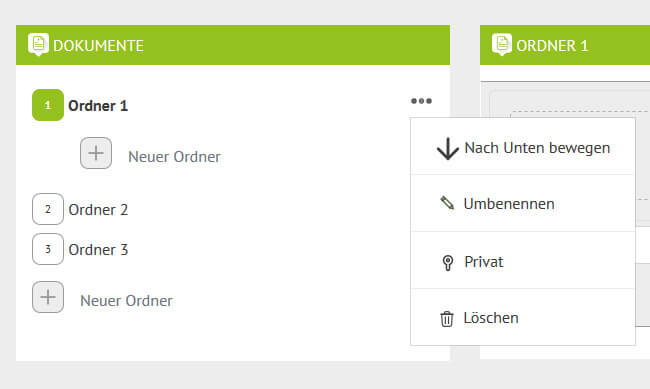
Move up / down
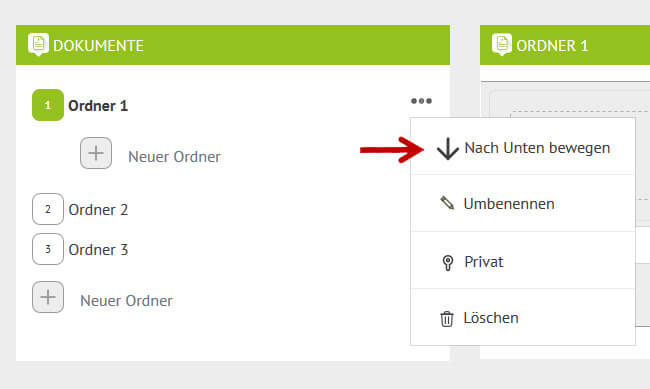
Rename
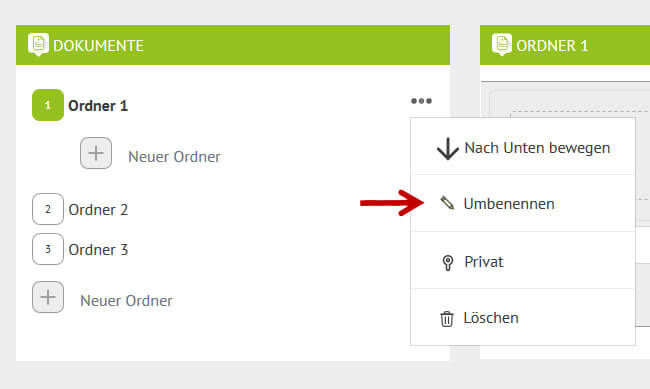
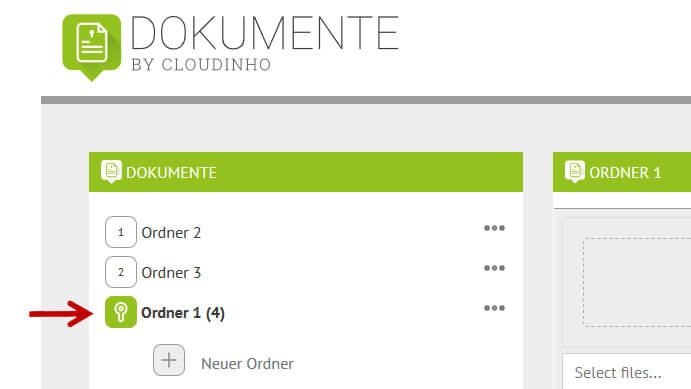
Private
The folder then receives the key icon in the icon and automatically maps itself under the public folder. This means that only you can see the folder and access this folder. You can also change the folder back to “Public” afterwards. Thus, all team members can see the folder again.
clear
2.2 Documents
You can upload and save any number of documents in any folder. There are two ways to upload the documents.
1. You can drag and drop documents into the upper field. Then the documents are uploaded to the selected folder with a click on the button “Upload” and saved there.
2. By clicking on the “Browse” button, you can select the documents on your device.
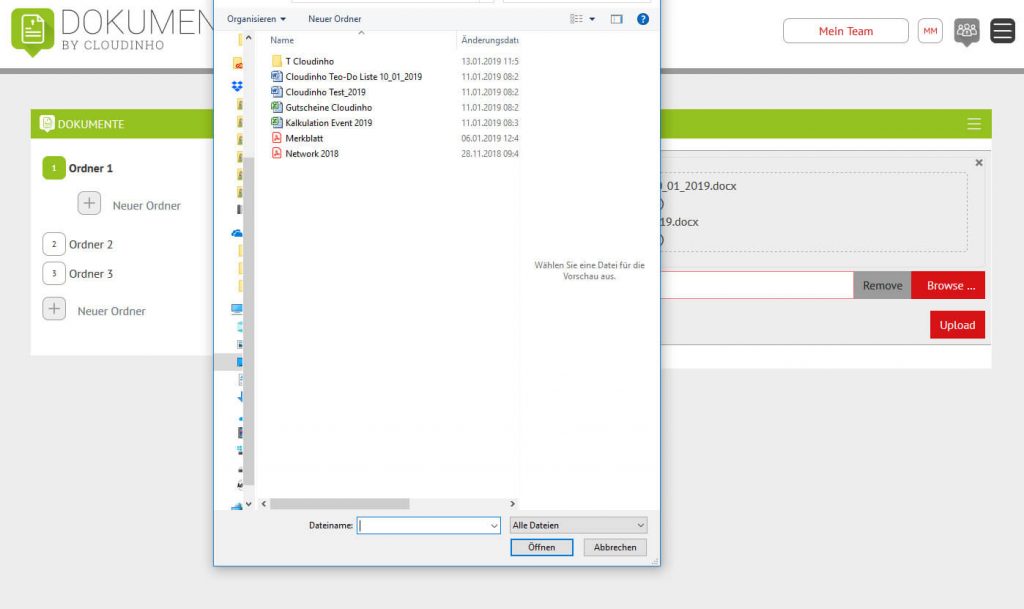
After you have selected one or more documents, they appear immediately in the box above.
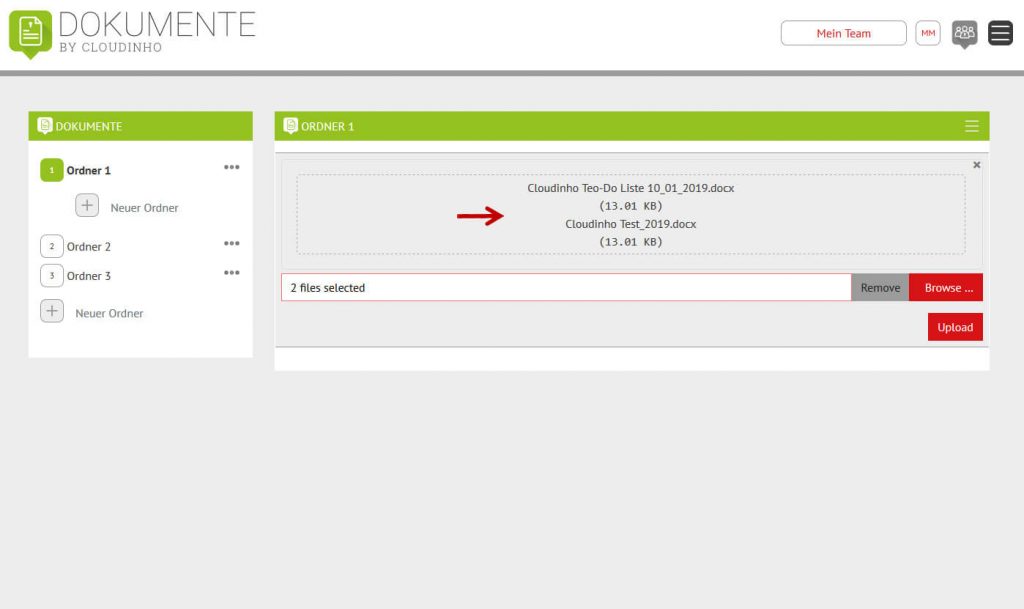
Then click on the red “Upload” button and the selected documents will be saved in your folder.
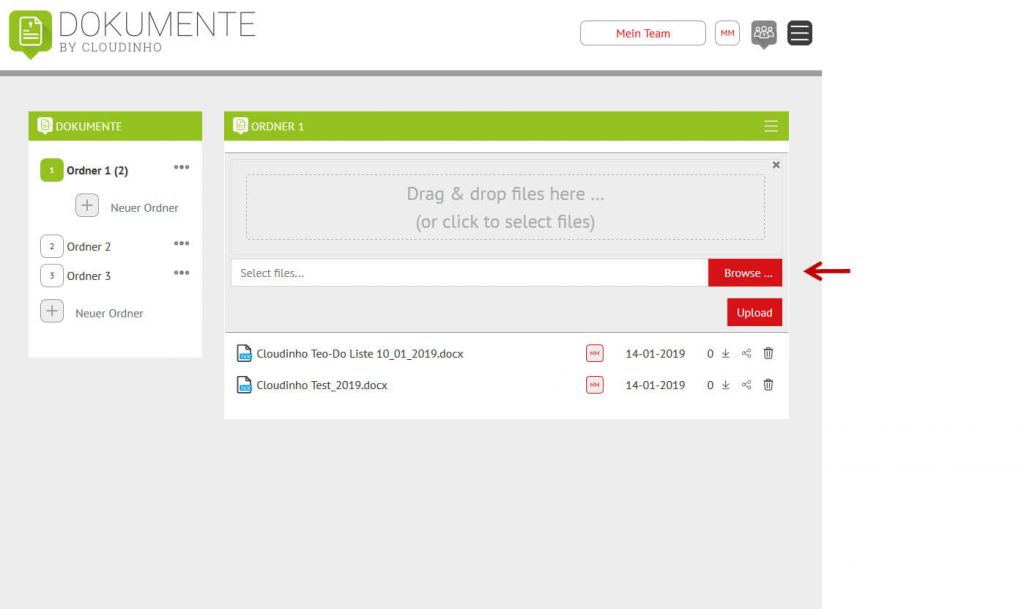
The following information can be found on every document:
a) Document name

b) Name of the creator

c) Date of upload

d) Number of comments

e) Download-function

f) Share-function

Once you’ve created a folder in the “SHARE” section, you can duplicate documents from any folder into any Share folder. All available Share folders are displayed after clicking on the Share icon. Click on the desired folder and the document is already duplicated in it.
g) Delete

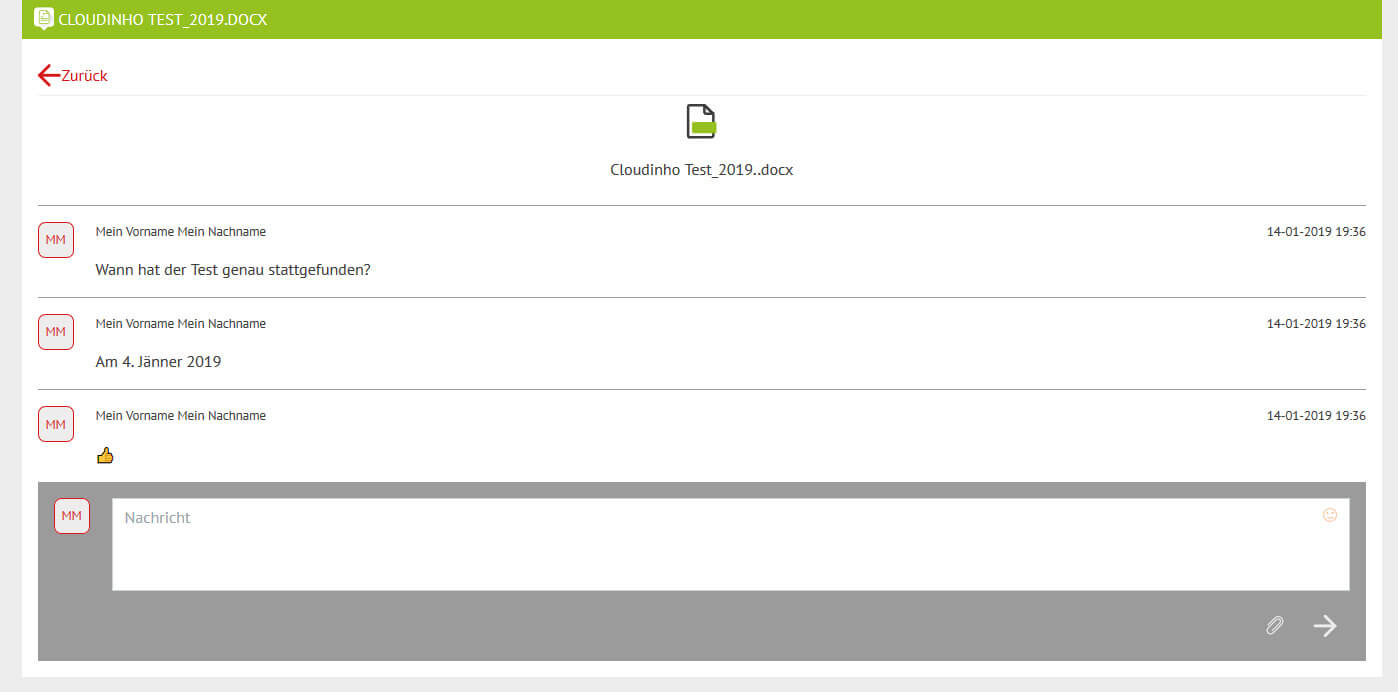
2.3 Comment function
Each document can be commented on by all team members. If you click on the document name, the document appears in single view. Below it can be commented.
2.4 Views
By clicking on the three bars on the top right, you can choose one of three different display variants.
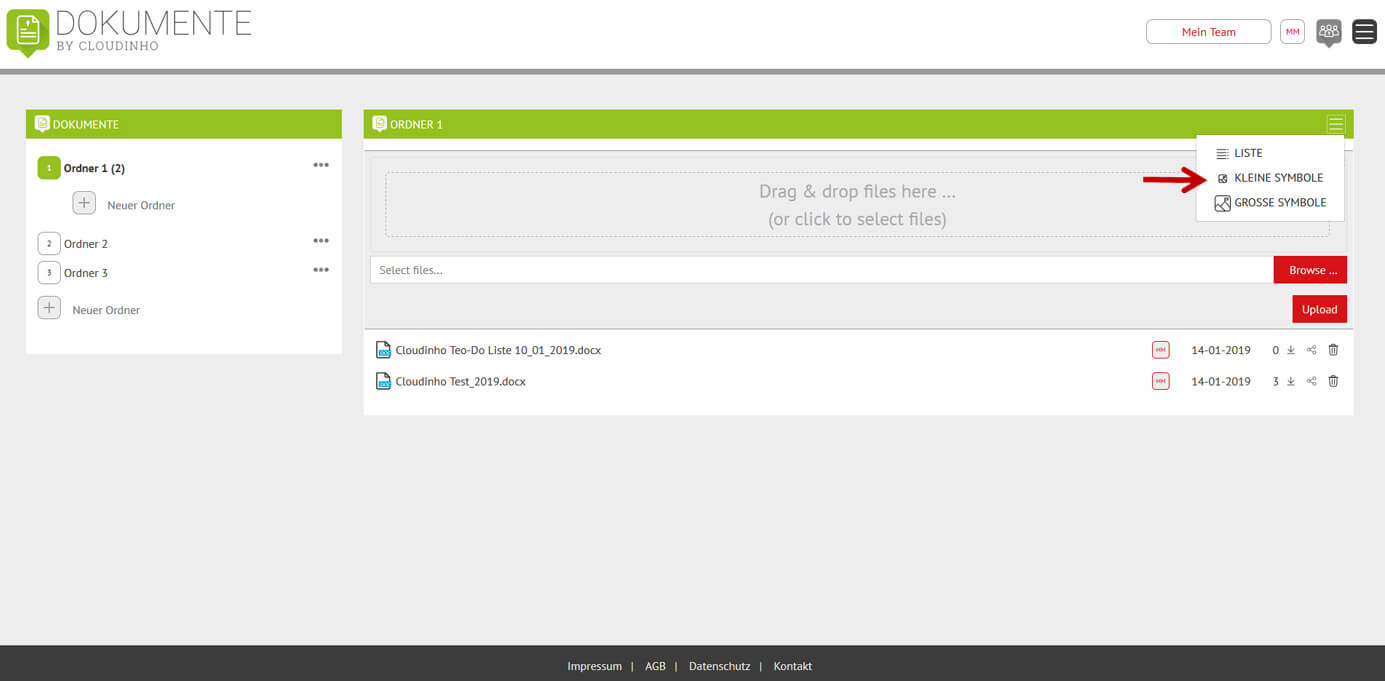
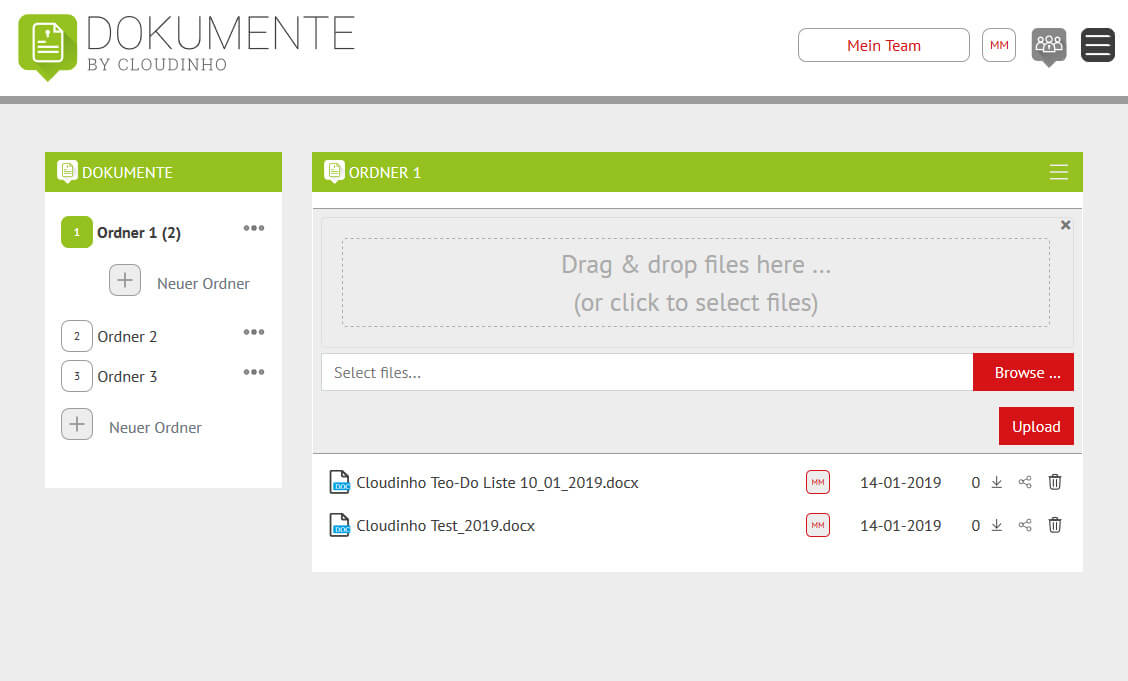
1. List
2. Small icons
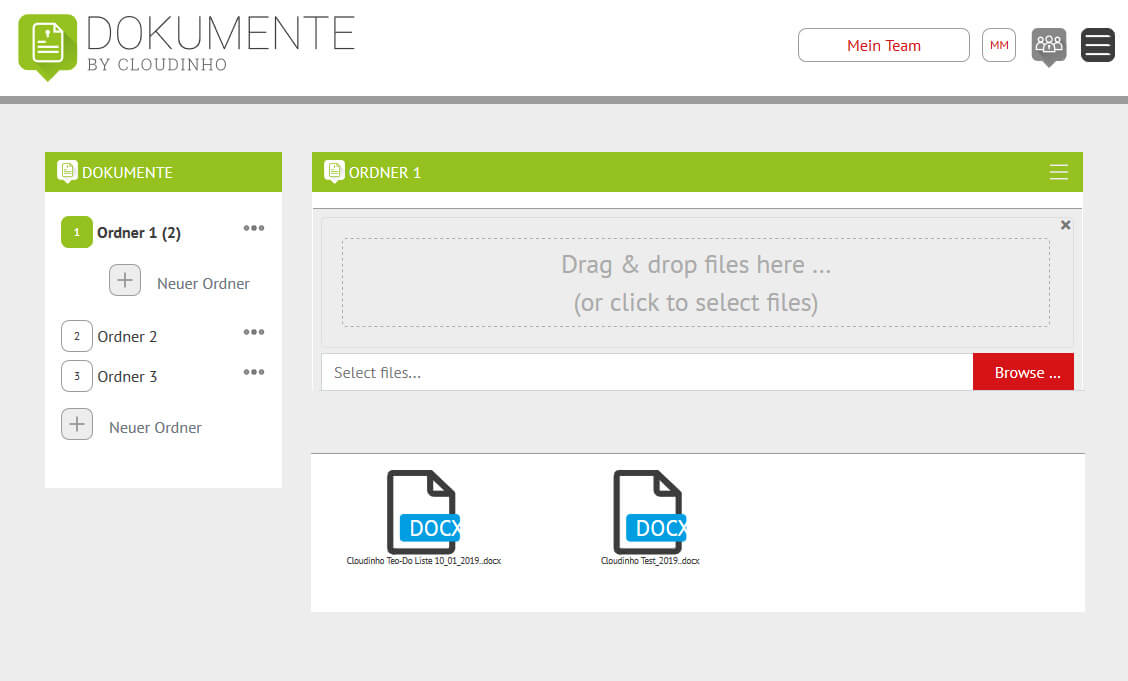
3. Big icons
![]()
In the “PHOTOS” section the following file formats can be saved:
jpg, jpeg, gif, png, tif, pdf, psd, svg.
![]()
In the section “VIDEOS” the following file formats can be saved:
mpg, mpeg, avi, wmv, mov, ogg, webm, mp4, flv.
![]()
The following file formats can be stored in the “AUDIO” area:
mp3, wav, ogg, flac, m4a.
![]()
The folder structure, the file management and also the comment function works exactly the same as in the area of the documents.
The SAFE can basically save all file formats from the areas of documents, videos and audio.
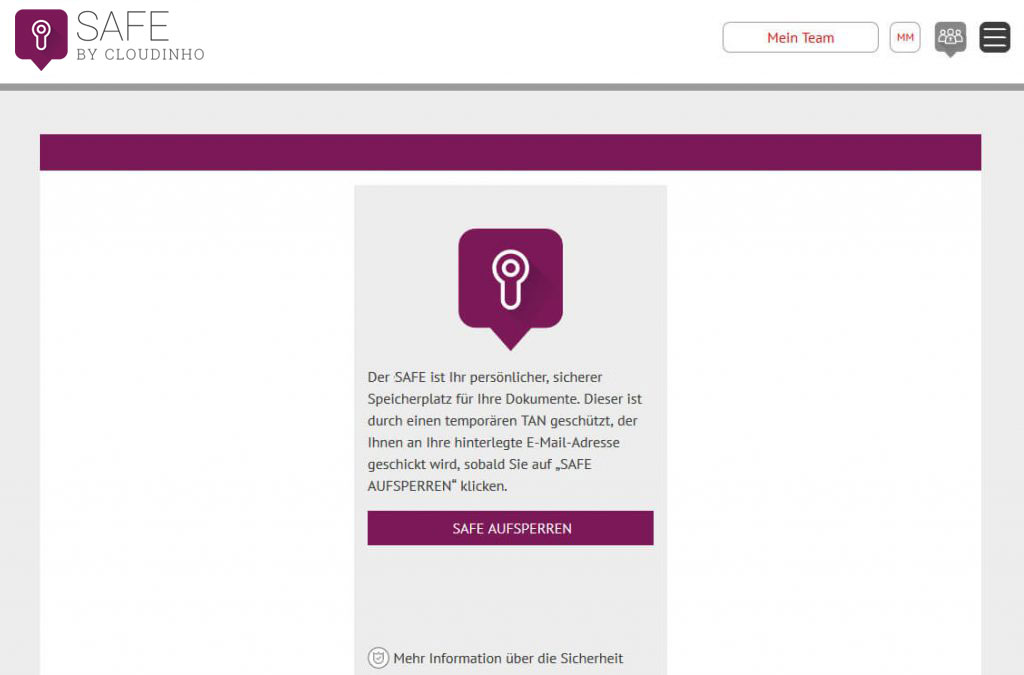
The SAFE is protected by a TAN code. The SAFE can be opened as follows: By clicking on the button “Unlock SAFE” you will receive an e-mail with the TAN code.
E-mail with the temporary password for a session in SAFE.

(If you have not received the e-mail: Check your junk / spam mail folder.) The e-mail has also landed there.)
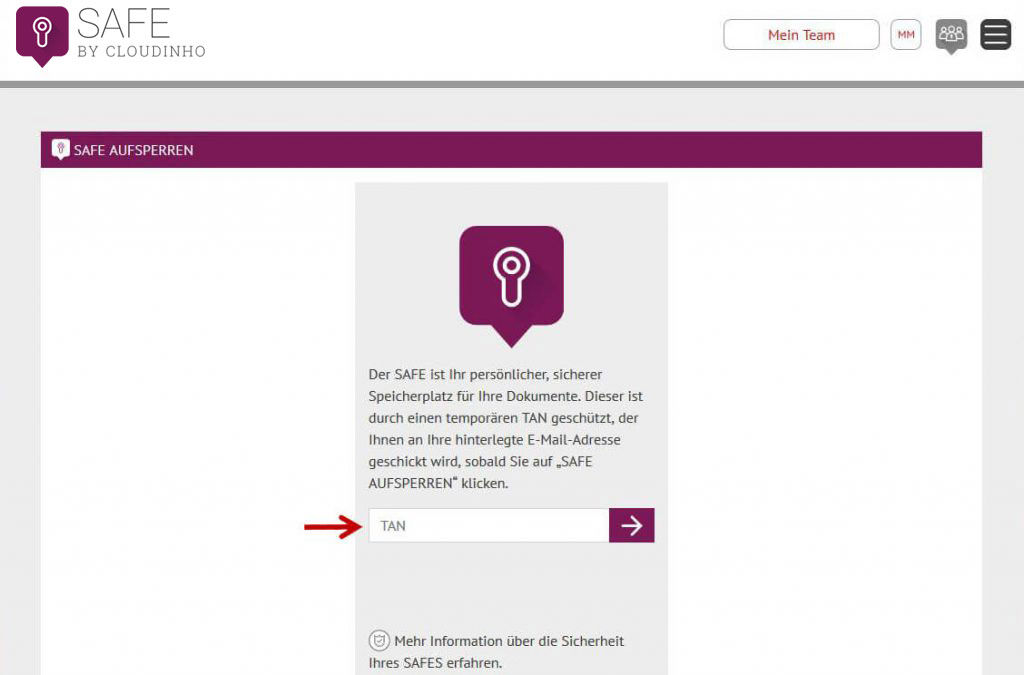
Now enter the TAN code in the field provided. Then click
on the arrow and the SAFE will open.
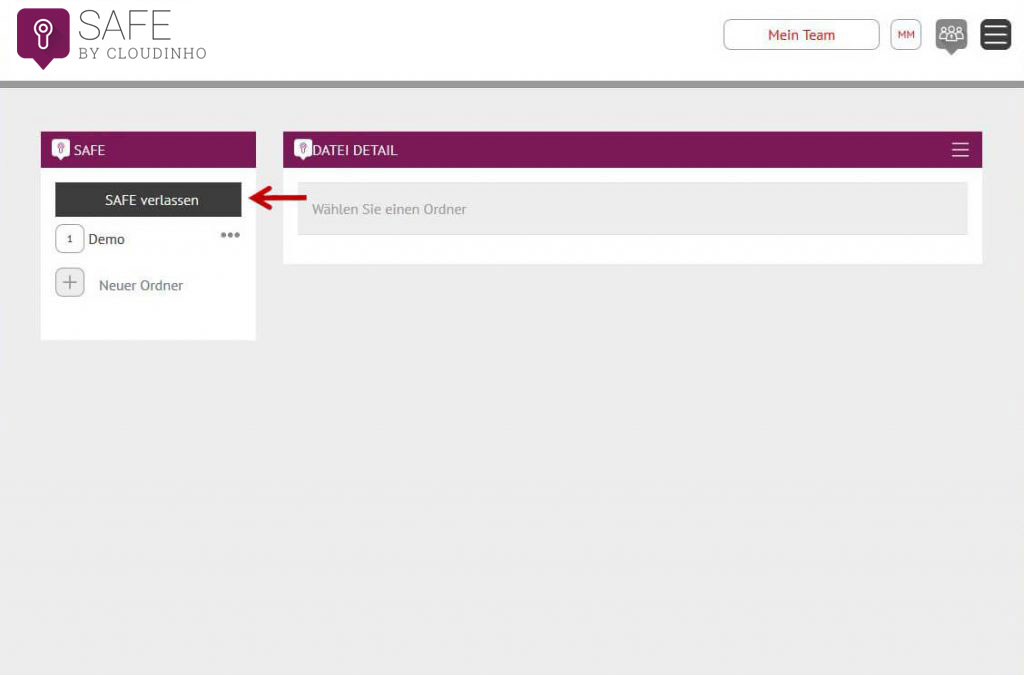
After the end of the session, click on the “Exit SAFE” button and close
it again.
![]()
In the “SHARE” section you can basically save all file formats from the areas of documents, videos and audio.
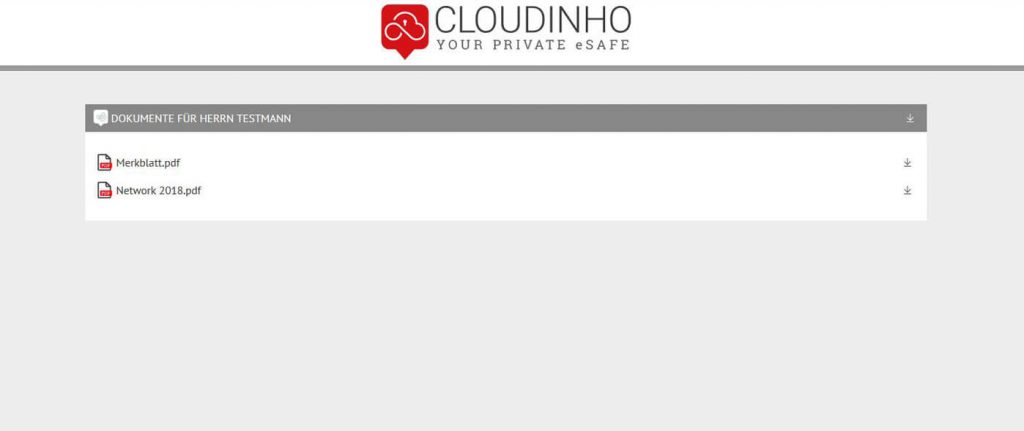
The “SHARE” section is used to make documents available to users outside your team. These can then without being logged in to CLOUDINHO, only see this folder if they are provided with the link for the folder.
Once you have created a folder in the “SHARE” section, you can duplicate documents from any folder into any share folder with the “share” icon.
„share“ icon:

In the folder you will find the link for external users in the upper right corner.
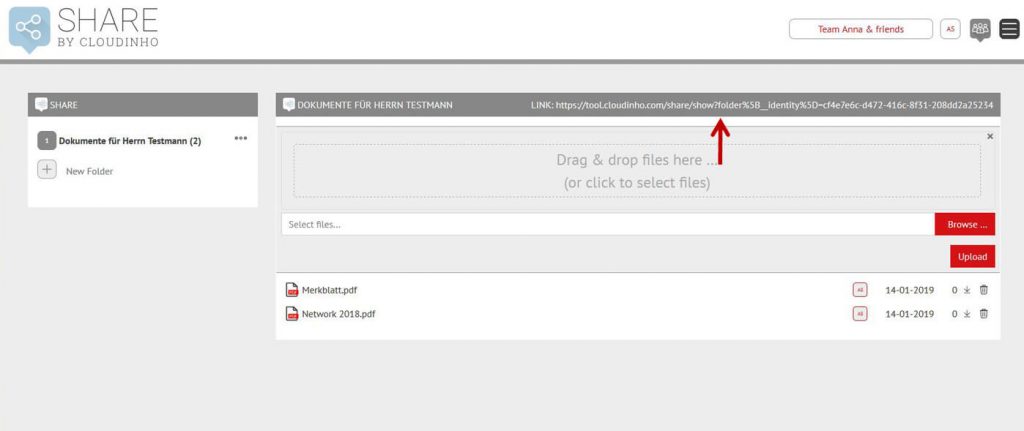
Once this link is entered by a user outside your team in a browser, it will see the contents of the folder and can download the files. If the folder is deleted, external access is no longer possible.
![]()
With our project management tool you can easily create, manage and structure projects and save the data stream.
Add a project

You create a new project by first clicking on the “+”, then entering the project name and clicking on the red arrow on the right.
Create a project
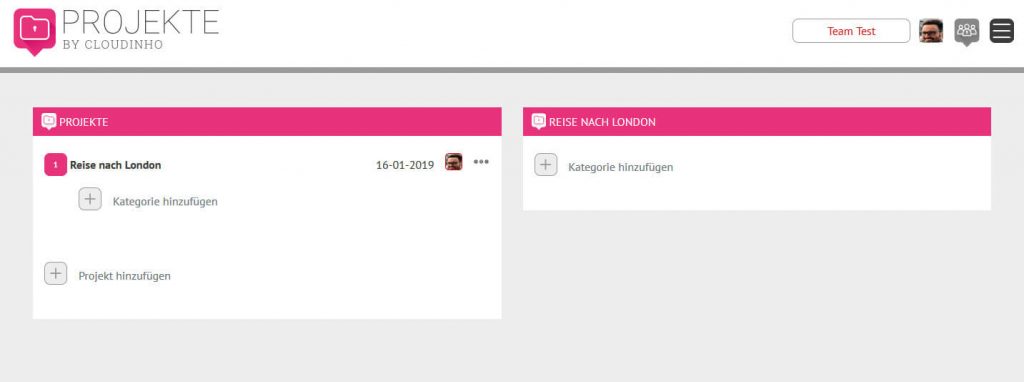
Thus, your project is created and provided with date and creator.
Project category
You create a new category by first clicking on the “+”, then entering the category name and right clicking on the red arrow. Thus, the first category is created and provided with date and creator.
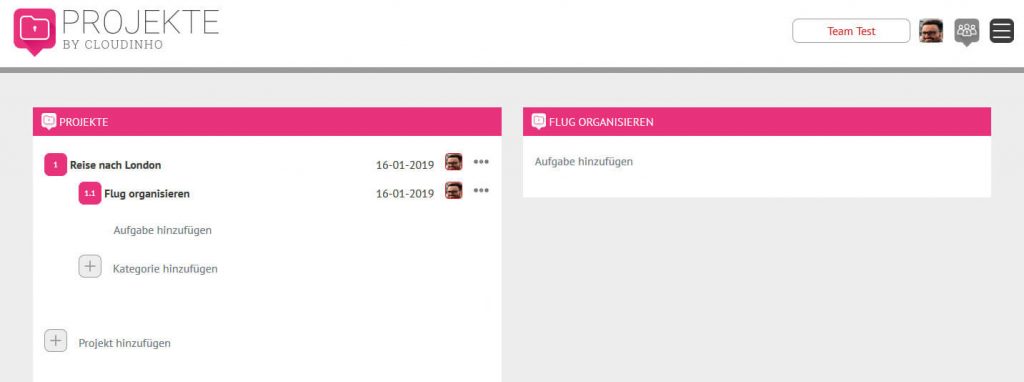
Create project task
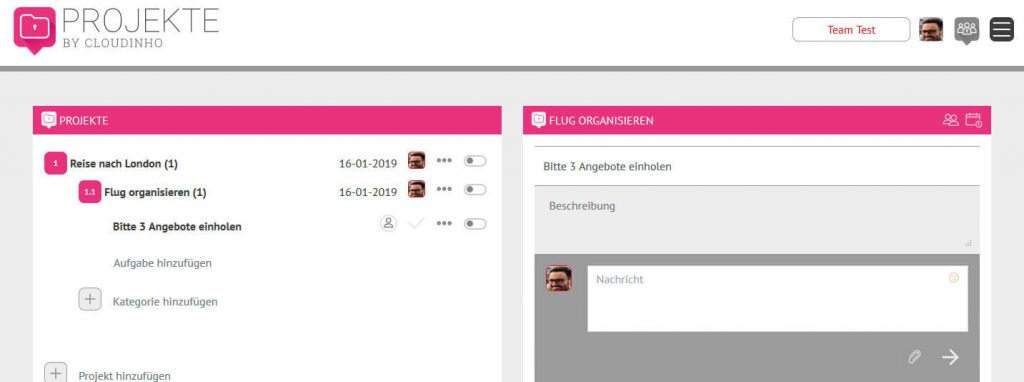
You create a new task by first clicking on the “+”, then typing the task and right clicking on the red arrow. Thus, the first task is created. You can also enter a description of the task immediately.
Assign task to a team member
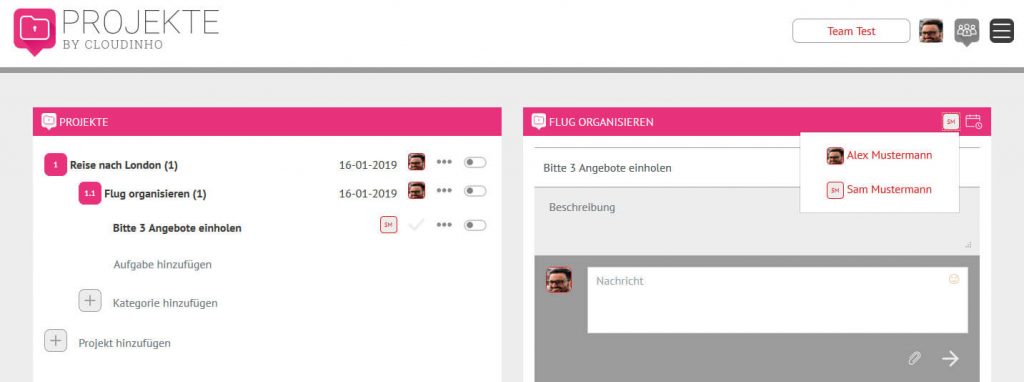
By clicking on the “People” icon, you can add the person to the task.
Task assign an appointment
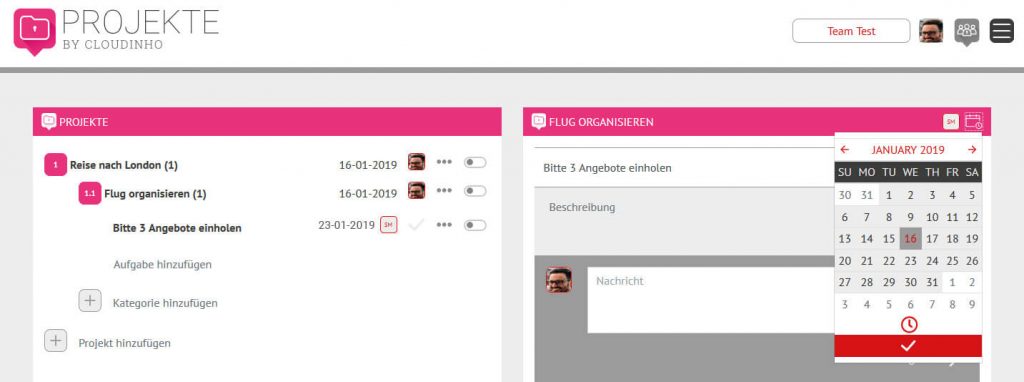
By clicking on the “Calendar” icon you can add an appointment to each task. The appointments are also automatically transferred to the calendar.
Tasks Communication
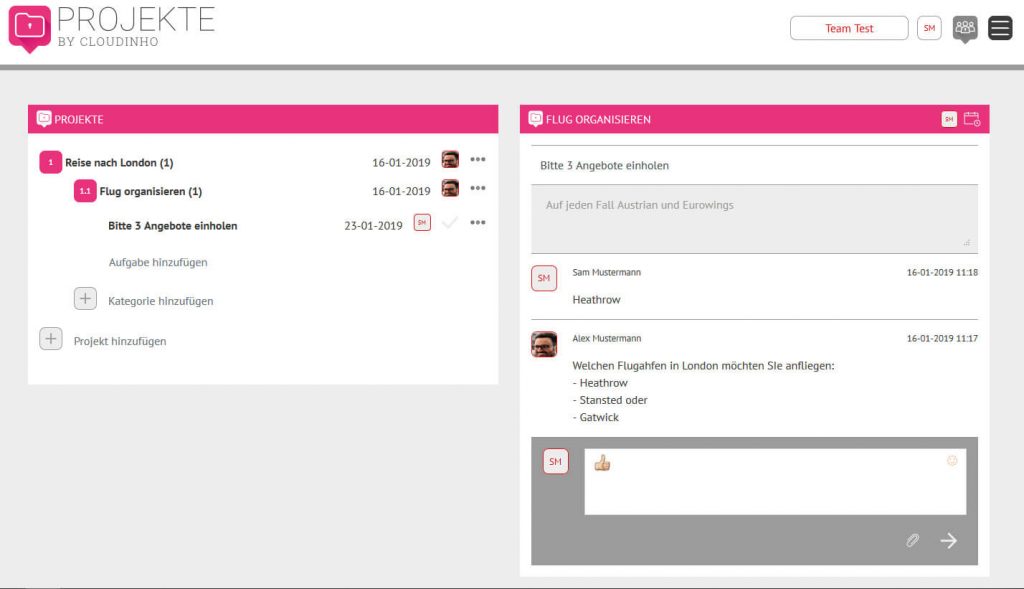
Under each task, you have the familiar comment function.
Finish tasks
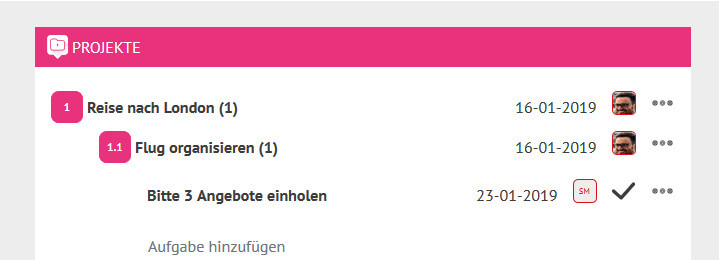
When you have completed the task, click on the hook icon. The symbol then appears dark gray.
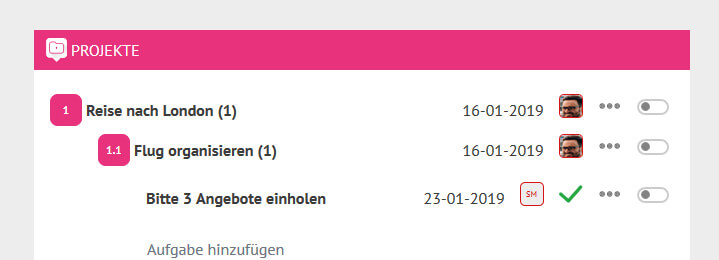
If the task creator clicks this again, it will turn green and the task is done.
![]()
In the whiteboard you have the opportunity to talk with your team members.
Create a topic
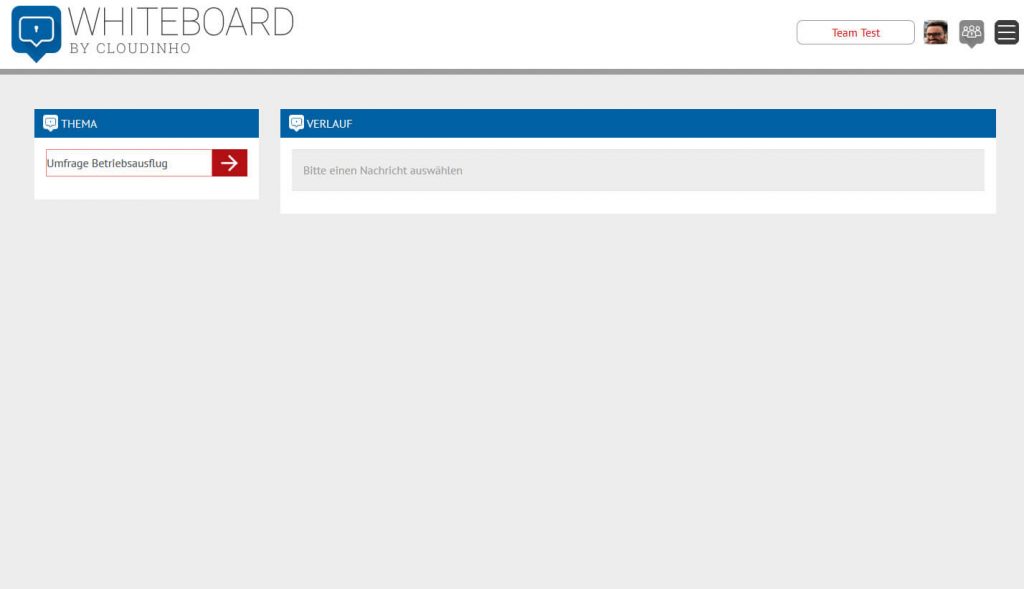
You create a new topic by entering the topic and clicking on the red arrow on the right.
Communication
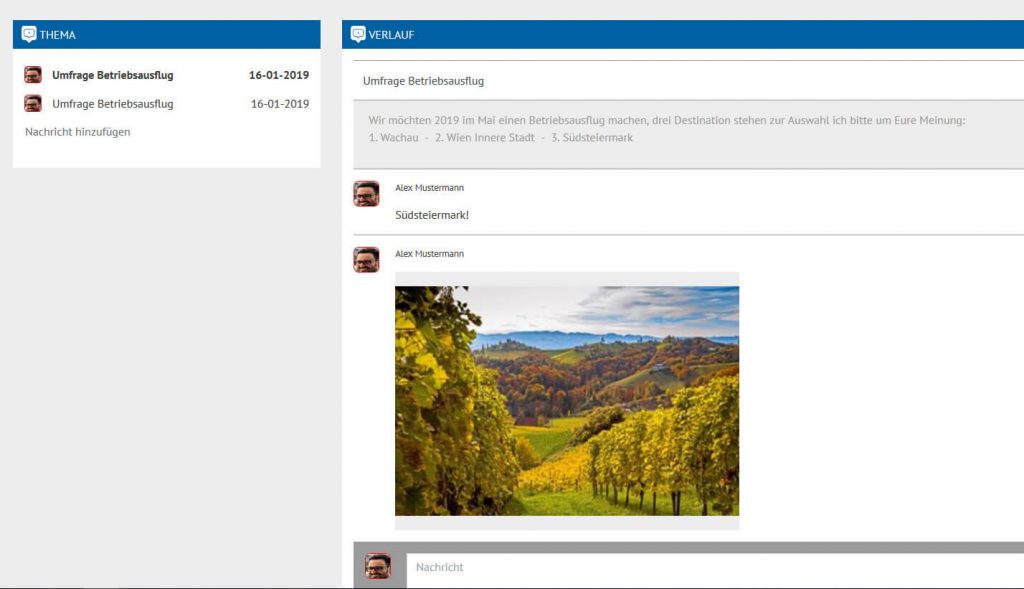
Then you chat with the already known commentary function in the right area.
![]()
In the calendar, you can create appointments on the one hand and on the other hand, all appointments in the projects area are automatically adopted.
Add appointment

You create a new appointment by clicking the “+” in the red button on the top right
Appointment name and description
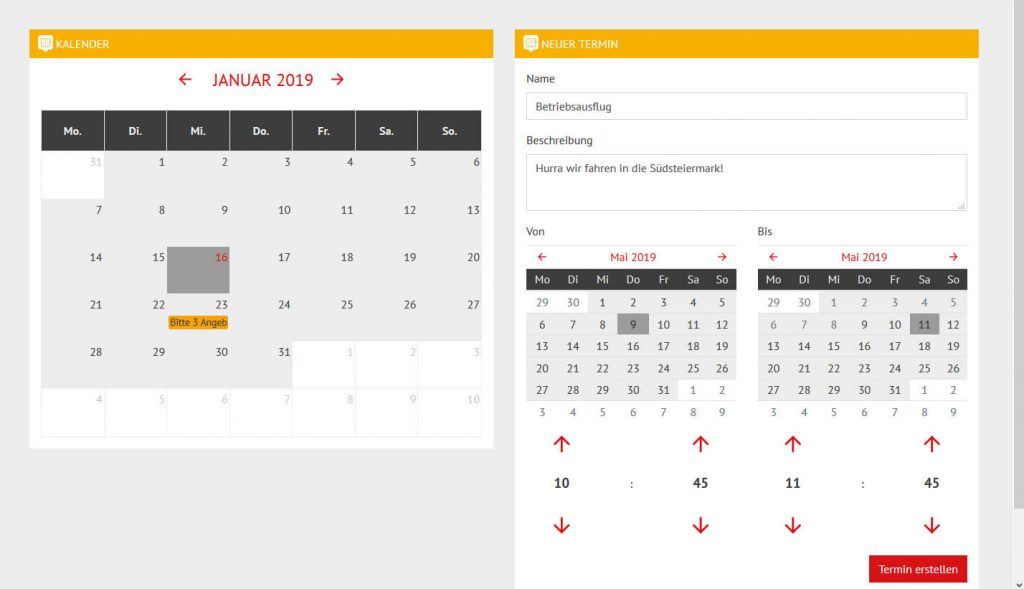
Enter the name and description, then set the date and time and click on the red button “Create appointment” on the bottom right.
Appointment created
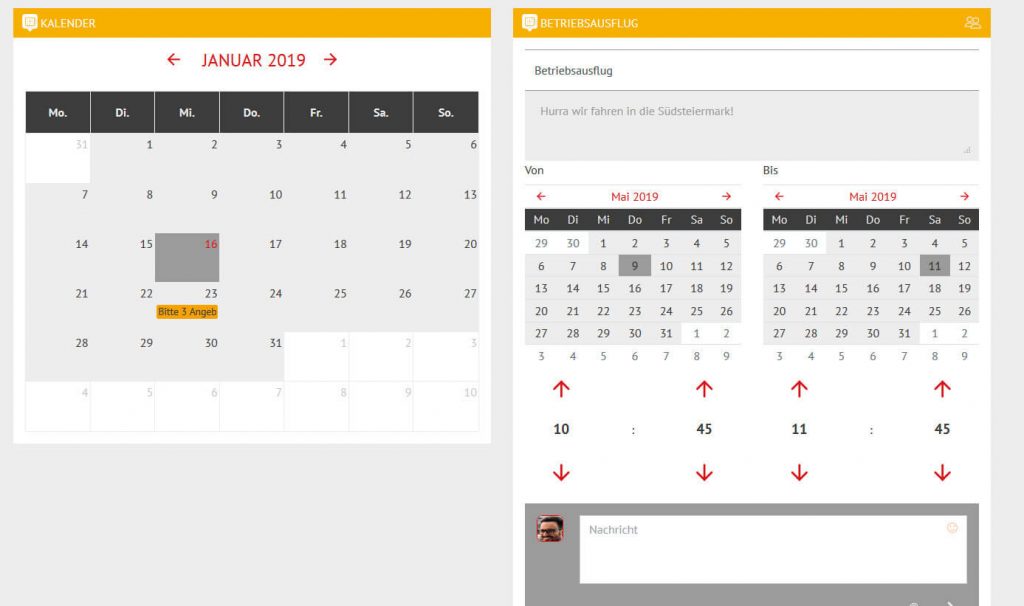
The appointment is now created, you can now also use the communication tool under each appointment here.
![]()
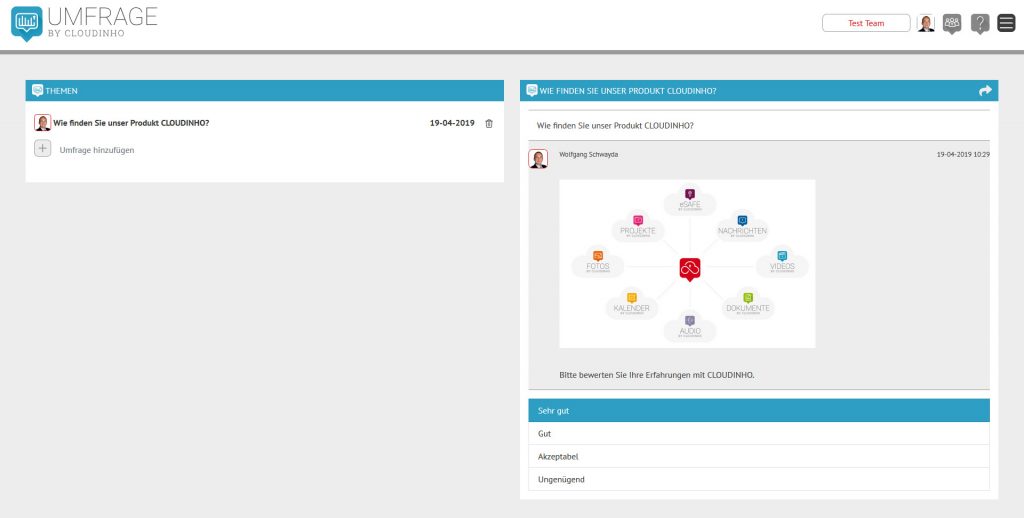
The survey allows you to conduct surveys, votes, elections or circular resolutions.
Create survey
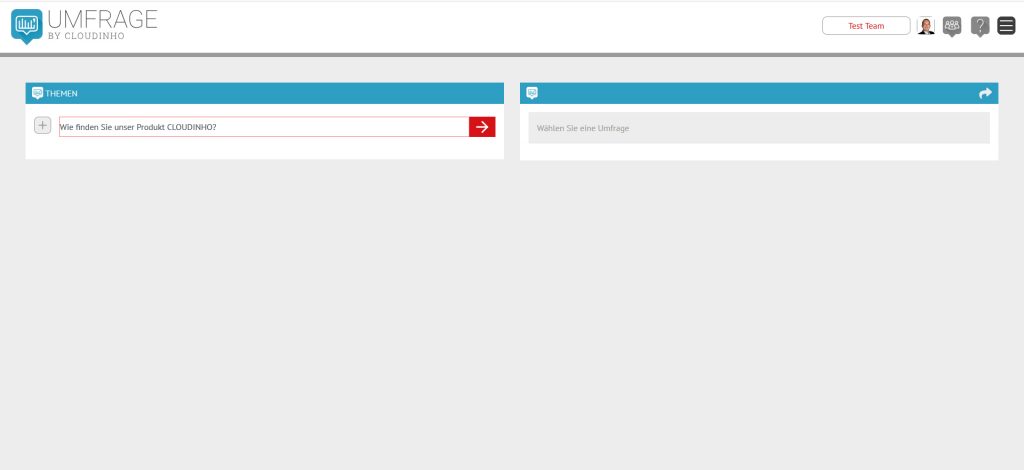
You create a survey by entering the title on the left side and clicking on the red arrow.
Create a survey description

You can now enter the description of the survey on the right-hand side and also add a document. Then click on the light gray arrow on the right.
Set visibility settings for your survey

Danach wählen Sie die Einstellungen für Ihre Umfrage. Bei den Einstellungen können Sie grundsätzlich die Sichtbarkeit des Ergebnisses, sowie die Sichtbarkeit der Auswertung (wer hat wie abgestimmt) mittels Dropdown Menü auswählen. Nach der Auswahl müssen Sie auf den roten Pfeil klicken um die Einstellung zu fixieren.
Antwortmöglichkeiten eingeben und festlegen
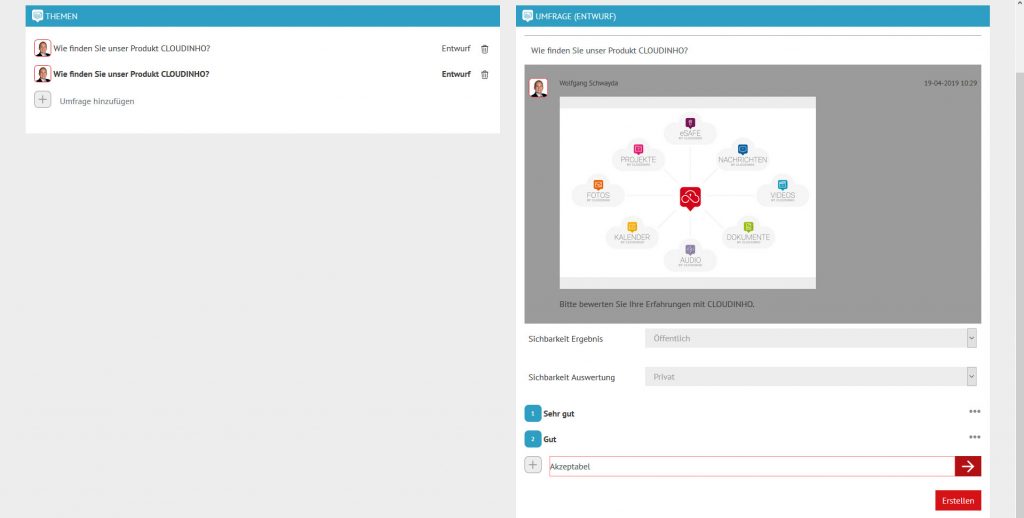
Sie können beliebig viele Antwortmöglichkeiten erstellen. Neben dem plus können Sie die Antwortmöglichkeit eingeben durch Klick auf den roten Pfeil wird die Antwortmöglichkeit fixiert. Wenn Sie alle Antworten eingegeben haben können Sie auf den roten Button erstellen klicken und die Umfrage ist erstellt.
Umfrage fertig erstellt